


Brow lamination has transformed professional salon menus by providing a semi-permanent treatment that reshapes, lifts, and sets unruly or downward-growing eyebrow hairs. By breaking and reforming the hair’s internal disulfide bonds, technicians can redirect growth patterns to create fuller, symmetrical, and perfectly groomed brows that last between 6 and 8 weeks. Mastering this technique requires a thorough understanding of hair structure, chemical processing times, precise styling, and client management.
A standard session takes approximately 60 minutes. Understanding how long eyebrow lamination takes allows technicians to structure appointments efficiently, ensuring sufficient time for client consultation, mapping, chemical processing, and detailed aftercare advice.
Pre-Treatment Safety and Patch Testing
A thorough pre-treatment assessment is mandatory before performing any chemical brow service. Screen every client for absolute and conditional brow lamination contraindications, such as active eczema, psoriasis, dermatitis, alopecia, or recent chemical peels in the treatment area. Clients using active skincare ingredients like Retinol, AHAs, or BHAs must discontinue these products 4 to 7 days prior to treatment to avoid skin sensitivity. Clients who have undergone microblading or permanent makeup must wait at least 4 to 6 weeks after their second touch-up session before receiving a lamination.
A patch test must be performed 24 to 48 hours before the service to screen for potential contact allergies and reduce the risk of adverse reactions or a chemical burn from brow lamination. Follow these exact steps for patch testing:
- Clean a 2 cm area of thin skin behind the client’s ear or on the inner elbow.
- Apply separate 1 mm dots of perming lotion, fixing lotion, tint/developer mixture, and nourishing cream using clean, disposable applicators.
- Leave the lifting and fixing lotion dots on the skin for 10 to 15 minutes before wiping them off with a dry swab, while leaving the other test dots intact.
- Instruct the client to keep the area dry, avoid cosmetics or scratching, and monitor the sites for 24 to 48 hours.
If the skin remains clear and calm after 48 hours, the result is negative and you may proceed with the treatment. Any localized erythema, itching, burning, swelling, or papules indicate a positive result, requiring immediate cancellation of the service.
Step 1: Preparation and Deep Cleansing
For chemical solutions to work uniformly, the brow area must be completely free of sebum, cosmetic residue, and skincare products. Residual oils create a barrier that prevents lotions from penetrating the hair shaft evenly, leading to patchy results or premature lifting failure.
Start by dampening the brows and surrounding skin. Apply a pump of oil-free cleansing foam to the brow area and massage gently in circular motions with a soft brush to lift trapped dirt and makeup. Rinse thoroughly with lukewarm water and pat completely dry with a towel. Finish the preparation by wiping the brow hairs with a specialized prep solution on a sponge applicator to thoroughly degrease the area.

Step 2: Brow Mapping and Shaping
Precision mapping ensures that the final brow direction enhances the client’s unique facial structure. Using a white charcoal pencil or mapping string, map the key anchor points: identify the starting point vertically from the outer corner of the nose, the arch at a 45-degree angle from the nose through the pupil, and the tail along the line from the nose past the outer corner of the eye.
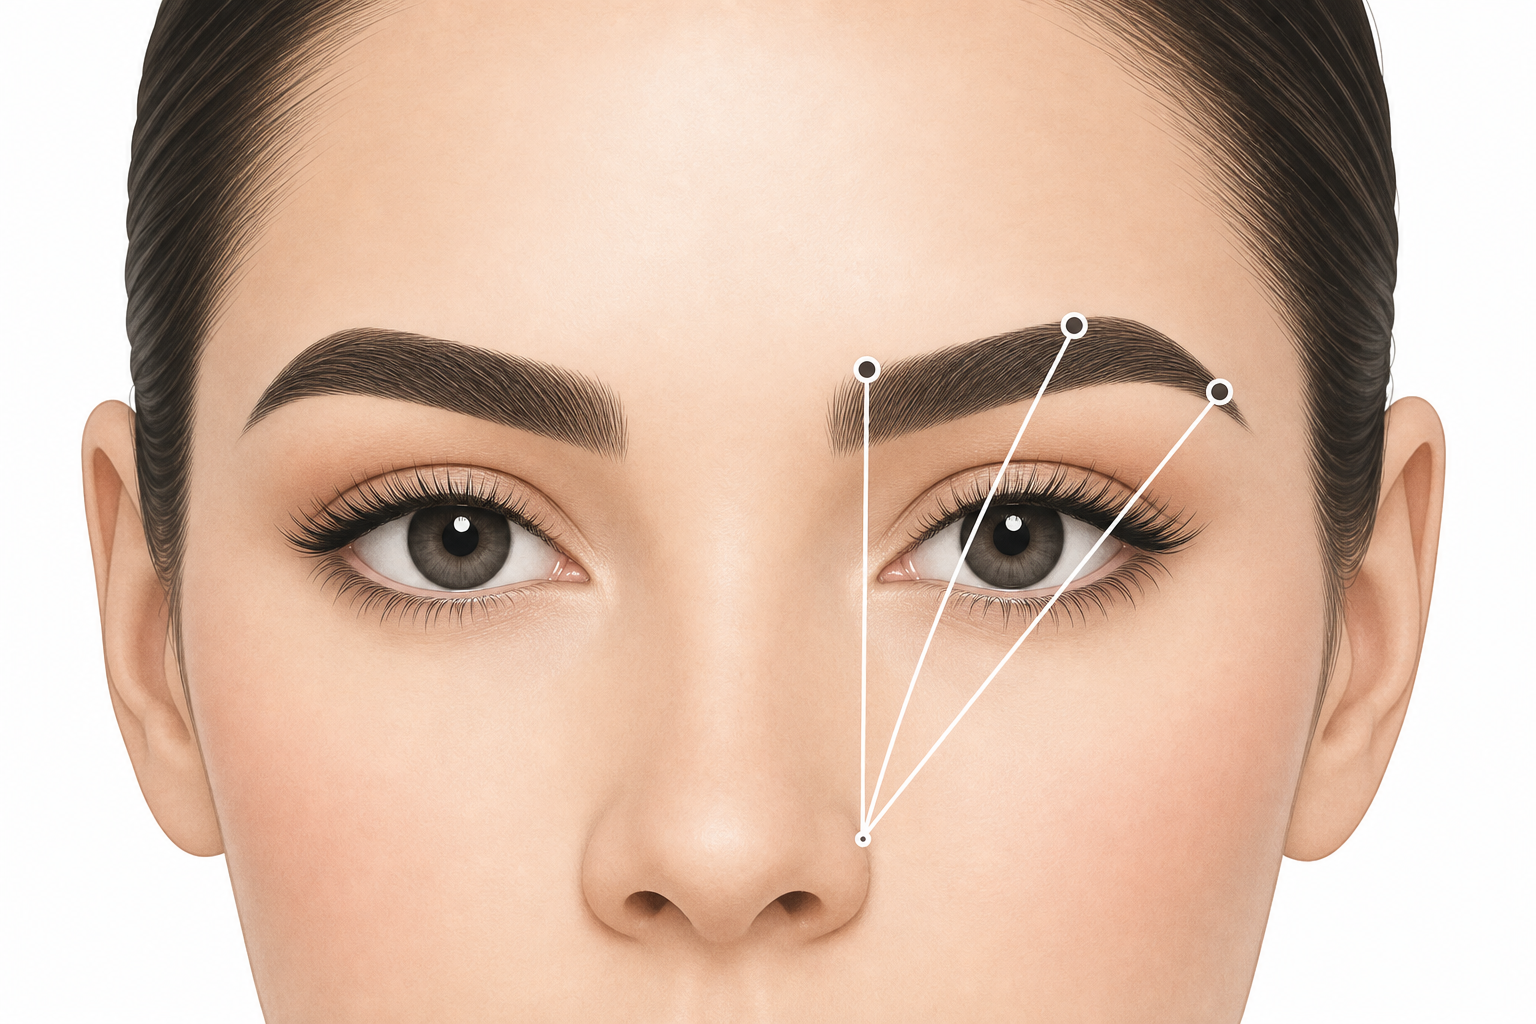
Using tailored brow shaping techniques allows technicians to address structural symmetry. By altering the direction of individual hair shafts during lamination, you can cover sparse gaps, soften aggressive natural arches, or visually balance asymmetrical brows.
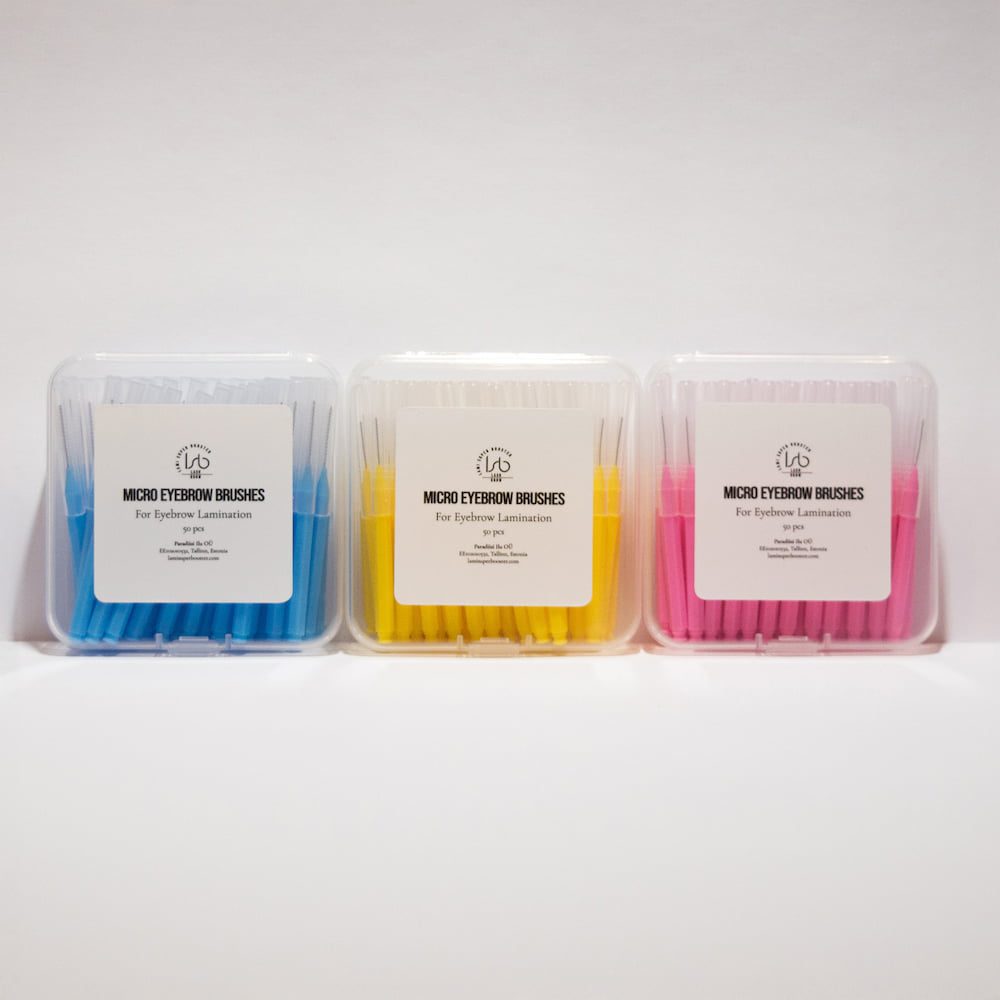
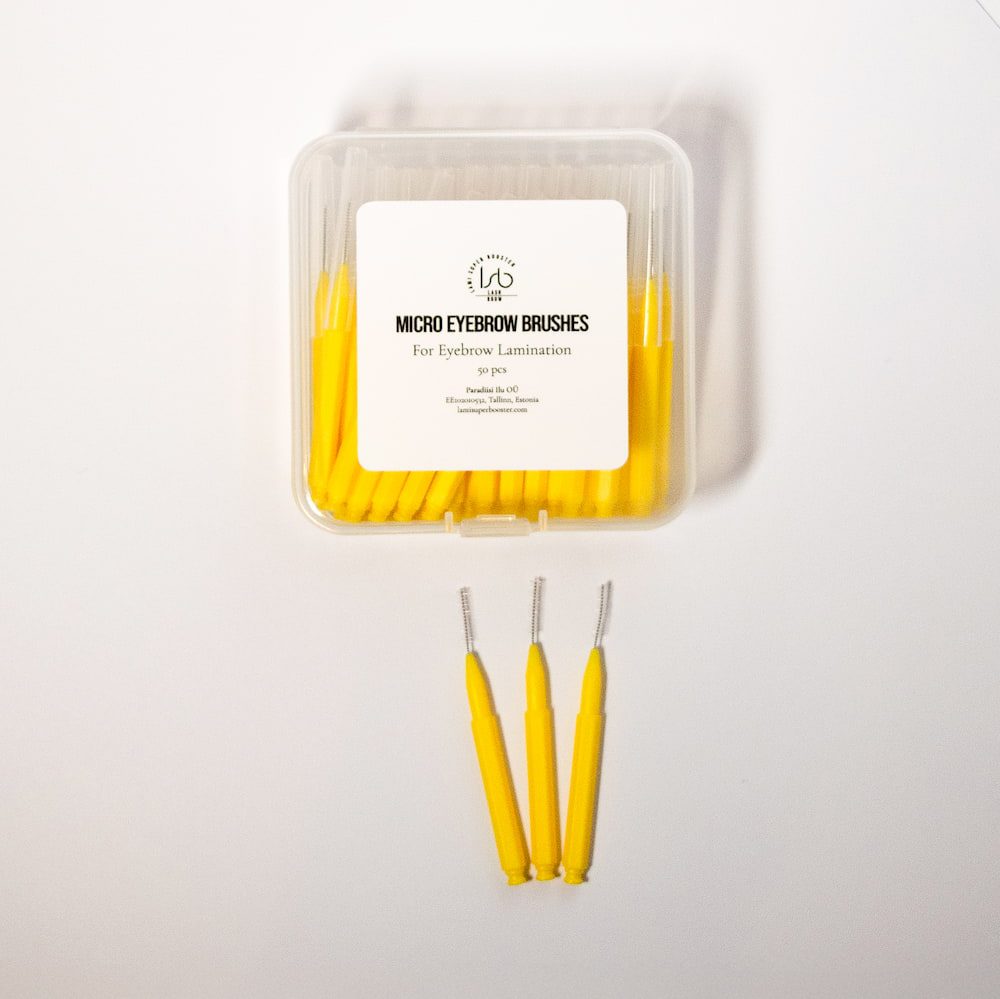
50 Micro Eyebrow Brushes
Step 3: Adhering and Directional Styling
Securing the brows in the target alignment provides structural control during processing. While advanced technicians working with fine hair types may choose glueless techniques, using a water-soluble adhesive or balm glue provides the hold necessary for coarse or stubborn hair.
Working sector by sector, apply a thin, 1mm layer of adhesive to the brow hairs. Work efficiently before the glue sets, using a Y comb or separation tool to brush the hairs into the desired direction. Ensure the hairs lie flat against the skin without overlapping or crossing over. Having high-quality brow lamination tools ensures uniform distribution and clean hair separation.
Step 4: Applying the Perming Lotion
The chemical transformation begins with Step 1 perming lotion. Formulated with active agents like Ammonium Thioglycolate or Cysteamine HCL, the curling lotion temporarily breaks the internal disulfide bonds, making coarse hair flexible and malleable.
- Apply an even layer of perming lotion to the base and mid-shaft of the brow hair using a microbrush.
- Avoid applying solution directly to the fine tips of the hair if they appear fragile or previously processed.
- Optionally, cover the brows with specialized brow lamination cling wrap to create a micro-environment that keeps the lotion stable and in place. No extra external heat is required.
Processing times depend strictly on hair density and recommended processing times. Check hair flexibility partway through processing by gently lifting the wrap and pressing the hair with a dry swab to confirm the bonds have softened. You can select specific formulations from professional brow lamination lotions based on client hair texture and sensitivity.
Step 5: Fixing and Neutralizing
Once the lifting phase achieves the desired flexibility, you must rebuild the disulfide bonds to lock the hair into its new shape.
Remove the perming lotion completely using a clean, dry cotton swab in gentle upward strokes. Avoid using water at this stage, as moisture can disrupt the chemical reset. Apply Step 2 fixing lotion evenly over the entire brow, ensuring full coverage from root to tip. The fixing lotion effects neutralize the lifting process, lower the hair’s pH, and stabilize the new structure. Cover again with processing wrap if used, and leave the lotion on for the exact same duration as Step 1. Once complete, remove all fixing lotion thoroughly with a dry cotton swab.
Step 6: Tinting and Color Refinement
Chemical processing during lamination can slightly lighten natural brow pigment. Adding a tinting service immediately after neutralizing restores depth and visual density. Technicians often evaluate whether to tint before or after brow lamination. Performing tinting after lamination is recommended because the hair cuticle is open, allowing pigment to absorb rapidly.
Mix your chosen shade from a professional eyebrow tint line with a 2% cream oxidant in a glass dappen dish using a 1:1 ratio. Apply the tint precisely to the brows with a fine brush. Monitor the color development closely; because the hair is highly porous post-lamination, processing usually takes only 2 to 5 minutes. Remove the tint using a dry cotton pad, followed by a slightly damp pad to remove any remaining pigment from the skin.


Step 7: Nourishment and Finishing
The final step restores cuticle integrity and essential moisture. Applying a keratin- and vitamin-rich lamination cream seals the cuticle scales, strengthens the internal structure, and adds a natural gloss.
Apply the lamination cream generously across both brows using a clean brush. Allow the product to process for 5 to 10 minutes so the active oils, vitamins, and keratin can penetrate the hair shafts. Clean off excess product with a dry cotton swab.
To conclude the service, remove any remaining adhesive residue from the surrounding skin using a gentle makeup remover. Inspect the final shape and perform a light trim on long hair ends using brow scissors to achieve a polished finish.


Managing Overprocessed Brows
Leaving perming lotions on fragile hair for too long or applying chemical solutions to previously compromised brows can cause overprocessing. Recognizing the signs early is essential to protecting client hair health. Overprocessed brow hair appears frizzy, dry, brittle, or singed at the tips. If a client presents with overprocessed hair from a previous service, or if you notice hair curling unexpectedly during Step 1, know how to manage a bad eyebrow lamination safely:
- Remove the Step 1 perming lotion immediately using a dry cotton swab.
- Apply Step 2 fixing lotion for a reduced duration (approximately 2 minutes) to neutralize chemical activity and rebuild remaining bonds.
- Do not apply any eyebrow tint during the same session, as oxidative color will exacerbate structural hair damage.
- Apply a generous layer of nourishing oil or deep conditioning serum immediately.
- Instruct the client to leave the nourishing treatment on the brows undisturbed for 48 hours before resuming gentle home care.
- Do not re-laminate the brows for at least 6 to 8 weeks, allowing the hair matrix sufficient time to recover.
Post-Treatment Aftercare and Maintenance
Proper post-treatment care is critical to maintaining the brow shape and preserving hair health. Educating clients on correct brow lamination aftercare prevents premature relaxation of the chemical bonds.
For the first 24 to 48 hours post-treatment, clients must keep their brows dry and avoid steam, saunas, swimming, heavy exercise, and direct facial contact while sleeping. Makeup and oil-based skincare products should not be applied directly to the brow area during this period.
After 24 hours, daily maintenance requires brushing the brows upward each morning with a clean spoolie brush to maintain alignment. Recommend a daily hydrating serum to restore moisture and maintain elasticity.
Educate clients on how often you can laminate brows. Rebooking appointments should be scheduled every 6 to 8 weeks to align with the natural hair growth cycle. For clients with fragile or fine hair, extend the interval to 8 to 10 weeks to prevent cumulative damage.
Elevate Your Professional Brow Services
Mastering step-by-step lamination techniques allows technicians to offer high-value brow services with consistent, safe results. Equipping your station with a complete professional brow lamination kit ensures that you have reliable chemical formulas, precise applicators, and post-treatment nourishers for every client.
Clients interested in maintaining their results at home can learn about safe grooming habits through our guide on brow lamination at home. For beauty salons and brand owners seeking to expand their business with customized beauty lines, explore our high-quality custom formulation options.
Explore our full range of professional brow lamination essentials to stock your salon with premium Italian-made formulas and tools today.
