


Lifting downward-pointing lashes presents a unique challenge for beauty technicians. Lashes that grow at a steep downward angle require careful tension, precise shield selection, and strict chemical control to achieve a clean, lasting upward curl. This professional guide details the technical steps, product choices, and troubleshooting techniques required to deliver reliable results on downward-pointing natural lashes.
Understanding Downward-Pointing Lashes
Downward-pointing lashes usually result from the natural directional angle of the hair follicle within the eyelid, though heavy or coarse hair textures can also weigh the lash down. These lashes frequently feature a tight natural curvature near the follicle base that directs the entire lash shaft downward, often obstructing the eye opening or casting a shadow over the iris.
Correcting this direction requires breaking the hair’s disulfide bonds while securing the lashes at an elevated angle against a silicone mold. Because downward-growing hair continuously exerts downward tension during processing, technical accuracy during pre-cleansing, shield placement, and tensioning is necessary to prevent premature drop or uneven lift.

Pre-Service Screening and Preparation
Before starting the treatment, perform a visual examination of the ocular area. Verify that the client is free of contraindications such as blepharitis, styes, conjunctivitis, inflammation, or recent eye surgeries. Clients with damaged, brittle, or severely overprocessed lashes should not undergo chemical perming until hair health is restored. A patch test should always be conducted 48 to 72 hours prior to the service to screen for product sensitivities.
Thorough preparation is essential for product penetration. Residual oils, waterproof makeup, or sebum create a physical barrier on the lash shaft, leading to uneven lifting lotion absorption.
- Cleanse the eye area thoroughly with an oil-free lash cleanser to strip all surface lipophilic residues.
- Ensure the eyelid skin and natural lashes are completely dry before positioning pads or shields.
- Apply under-eye gel patches to secure lower lashes and isolate the treatment zone.
Technicians combining chemical lifts with deep conditioning protocols can review the fundamentals of eyelash lamination techniques to improve client retention and hair flexibility.
Shield Selection and Placement Strategy
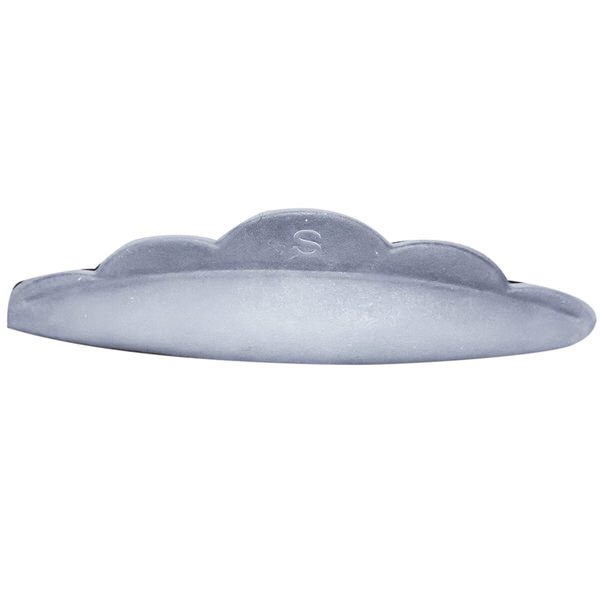
Selecting the correct shield contour directly determines root leverage. For downward-pointing lashes, choose anatomically shaped silicone lash lift shields that provide a flatter base or tighter curve near the root area.
- Lash Length Matching: Select shield size based on natural lash length. Small shields suit short lashes under 7 mm or clients requiring a steep root lift. Medium shields work for 8 to 12 mm lashes, while large shields are reserved for lashes exceeding 12 mm requiring a gentle sweep. Refer to the complete lash lift shield size guide for detailed size selection formulas.
- Shield Profile Choice: Flat or teardrop shields work exceptionally well for downward lashes because they elevate the lash root directly upward without creating an over-rotated curl that hits the eyelid. Reviewing professional silicone shield types helps match shield curvature to eye morphology, particularly for hooded eyes.
- Two-Step Korean Flat Shield Method: For stubborn Asian lash types or downward-pointing growth, an ultra-flat silicone shield can be used during Step 1 (lifting lotion) to ensure complete chemical access from root to tip, before transferring lashes to a contoured shield for Step 2.
- Precision Attachment: Apply a thin, even 1 mm layer of water-soluble adhesive along the rear channel of the shield. Allow the adhesive to become tacky for approximately 30 seconds before placing the shield as close to the lash margin as possible without resting on the eyelid skin.


Lash Isolation, Tensioning, and Compensators
Achieving consistent elevation across the entire eyelid demands strict lash isolation. Downward-pointing lashes must be lifted onto the shield with firm, uniform tension to counteract their natural growth habit.
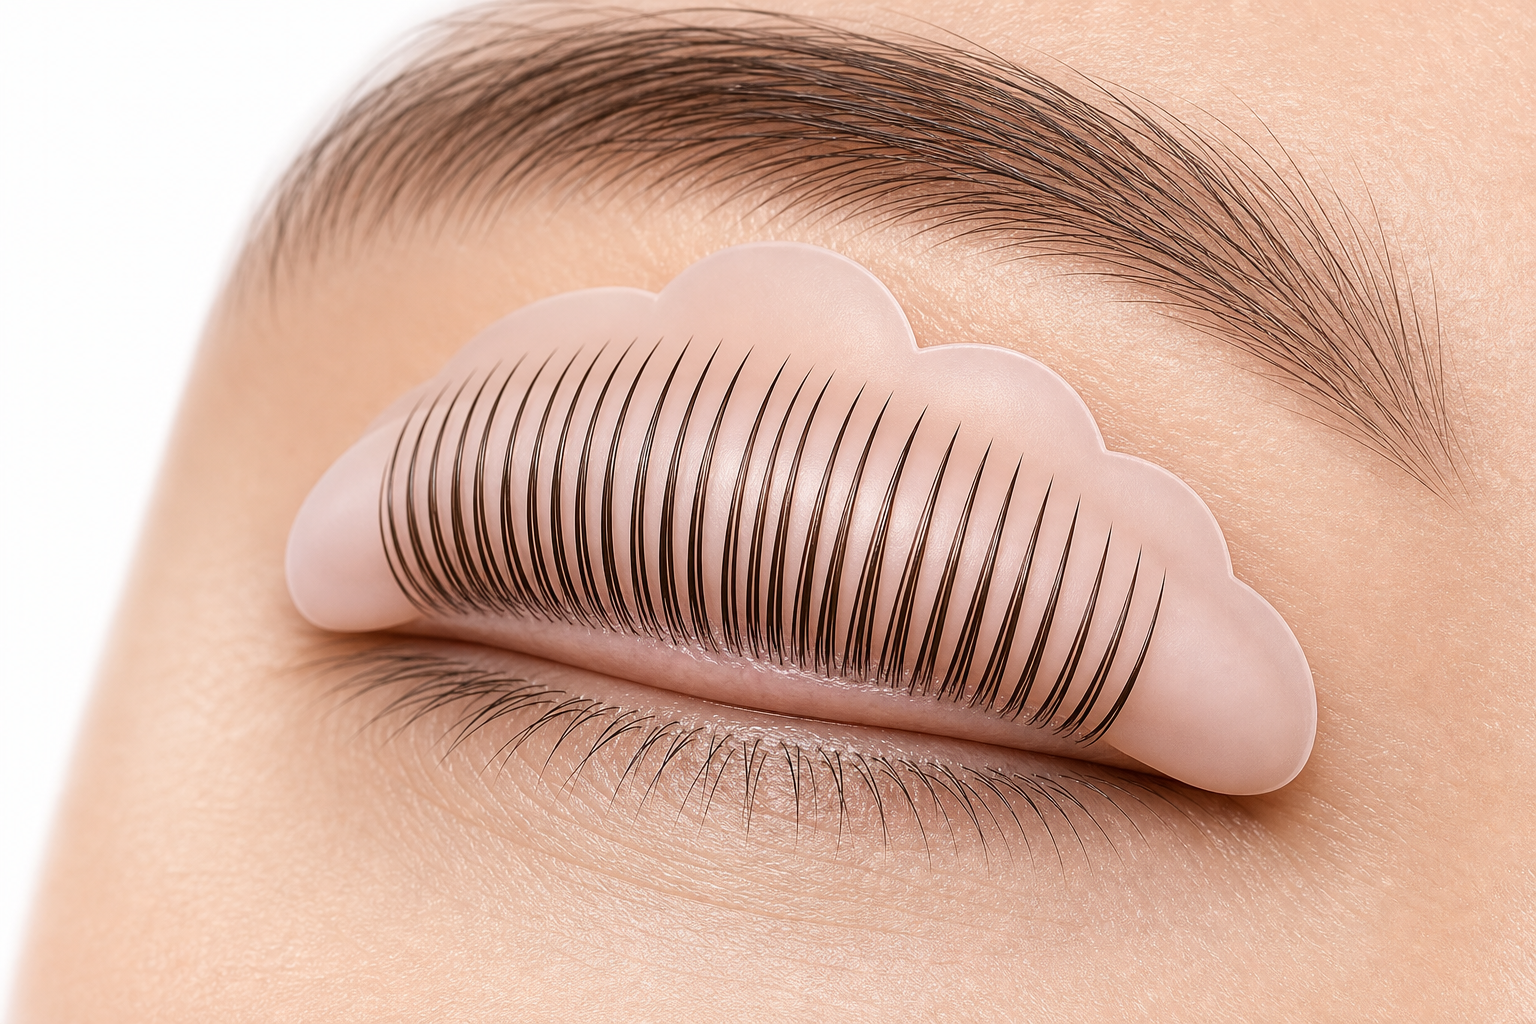
- Use a fine-tipped isolation tool or specialized Y-comb to pull lashes upward onto the shield at a 90-degree angle to the shield base. Ensure lashes are separated individually without overlapping or crossing.
- Ensure natural lashes extend two-thirds to three-quarters up the shield surface for maximum lift efficiency.
- Apply reusable silicone compensators over the lashes once they are aligned on the shield. Downward-pointing lashes – especially coarse hair types – frequently pop off the silicone curve during chemical processing. Compensators hold the hair firmly against the shield throughout processing, ensuring uninterrupted bond softening.
To explore specialized isolation accessories and applicators, browse our range of lash lift tools and accessories designed for high-precision salon workflows. Professional isolation steps are detailed further in the guide on how to apply lash lift shields.

Lash Lift Compensators, 3 Pairs

Solution Selection and Processing Guidelines
Choosing the right chemical formulation depends on lash thickness, porosity, and client skin sensitivity. Technicians generally choose between traditional ammonium thioglycolate formulations and cysteamine HCL systems. A comprehensive analysis of active chemical mechanisms is available in the guide to perming lotions for lash lifts.
- Ammonium Thioglycolate Systems: Provide strong reducing action suited for extremely coarse, stubborn downward-pointing hair structures.
- Cysteamine HCl Systems: A gentler, nourishing alternative that reduces disulfide bonds while maintaining structural hair integrity. Cysteamine formulations work exceptionally well in Korean lash lift techniques and glueless lifting methods.
Application and Processing Steps
- Apply Step 1 lifting lotion starting 1 to 2 mm away from the lash roots, extending through the mid-length. Do not apply lotion to the delicate tips of the lashes to prevent chemical frying and adhesive breakdown.
- Adjust timing strictly according to hair texture.
- Remove Step 1 completely using a dry micro-brush before applying Step 2 fixing lotion.
- Apply Step 2 fixing lotion to the exact same zone for the identical duration as Step 1 to rebuild disulfide bonds into the new elevated shape.
Explore professional systems in our dedicated lash lift kit collection and specialized lash lift lotion formulations.

Iconic Duo Cysteamine Lash Lift Kit medium


Troubleshooting Common Technical Challenges
Insufficient Lift or Premature Drop
If downward-pointing lashes fail to hold an upward curve, the cause usually stems from technical execution errors during shield placement or chemical processing. Diagnosing root causes is simplified by consulting the guide on troubleshooting lash lift underprocessing.
- Shield Oversizing: Using a shield that is too large creates a long, gradual curve rather than root leverage, allowing downward-pointing lashes to droop. Downsize to a smaller shield or select a flat profile.
- Inadequate Lotion Placement: Applying lifting lotion too far from the base leaves the natural root angle unchanged. Ensure product placement begins 1 to 2 mm from the lash root.
- Processing Underestimation: Coarse downward lashes require precise timing. Ensure hair strength is evaluated correctly prior to timing selection.
Uneven Direction and Separation Errors
Uneven results occur when lashes cross during the adhesive mounting phase or when lotion distribution is non-uniform. Always inspect lashes in a mirror from multiple angles before applying chemical steps. If correction is needed, adjust shield placement and re-align misdirected lashes using water-soluble adhesive before proceeding.
Client Consultation and Aftercare Protocols
Educating clients on proper post-treatment care is critical to retaining lift height on naturally downward-growing hair.
- Critical Window (24–48 Hours): Advise clients to keep lashes completely dry and avoid steam, saunas, hot showers, intense workouts, and eye makeup. Moisture or heat introduced before bonds fully stabilize can cause downward lashes to revert to their original orientation.
- Cosmetic Avoidance: Clients must refrain from applying waterproof mascara or oil-based eye creams, as these weaken the restructured hair matrix.
- Daily Maintenance: Recommend daily brushing with a clean spoolie and application of a daily conditioning lash serum or lamination cream to maintain hydration and flexibility between appointments.
- Service Maintenance Cycle: Schedule maintenance appointments every 6 to 8 weeks to treat new downward-pointing natural growth as old lifted lashes shed through the natural hair cycle.
Mastering Downward Lash Transformations
Correcting naturally downward-pointing lashes requires an active technical approach. By selecting flat or small-diameter silicone shields, securing hair tension with compensators, and applying accurately timed perming and fixing lotions, beauty technicians can deliver dramatic, long-lasting vertical lift on even the most stubborn lash types.
Equip your treatment room with professional Italian-formulated lifting kits, precision tools, and silicone shields by exploring our complete range of professional lash lift products at Lami Super Booster. Upgrade your salon offerings today to deliver flawless, elevated results for every client.
