Brow lamination has taken the beauty world by storm, offering a semi-permanent solution to the full, feathery brows you’ve seen all over Instagram. But with regular salon visits adding up, you might be wondering if you can achieve the same results at home. The answer is yes! With the right technique and products, you can laminate your eyebrows yourself. This article will guide you through the process step by step and recommend products to help you nail the look.
Step 1: Patch Test and Prepare
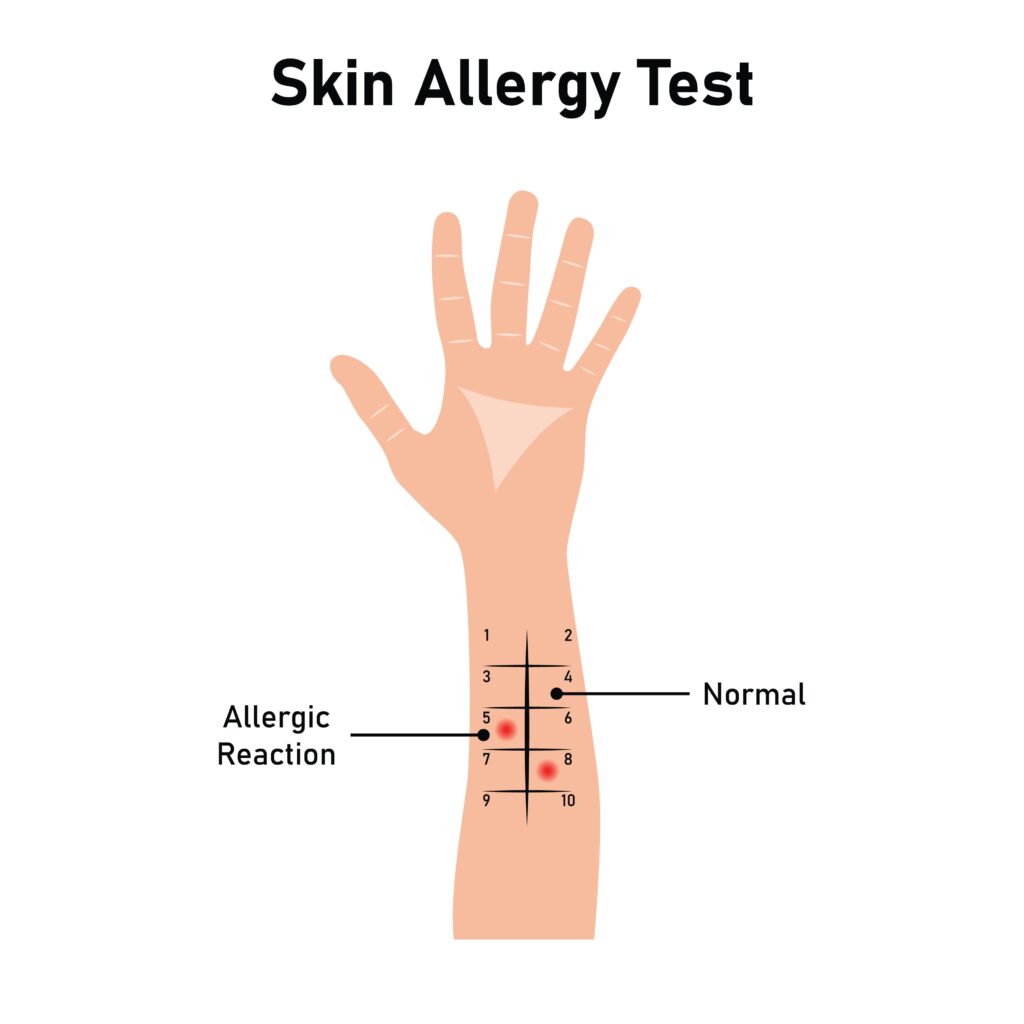
Image source: stock.adobe.com
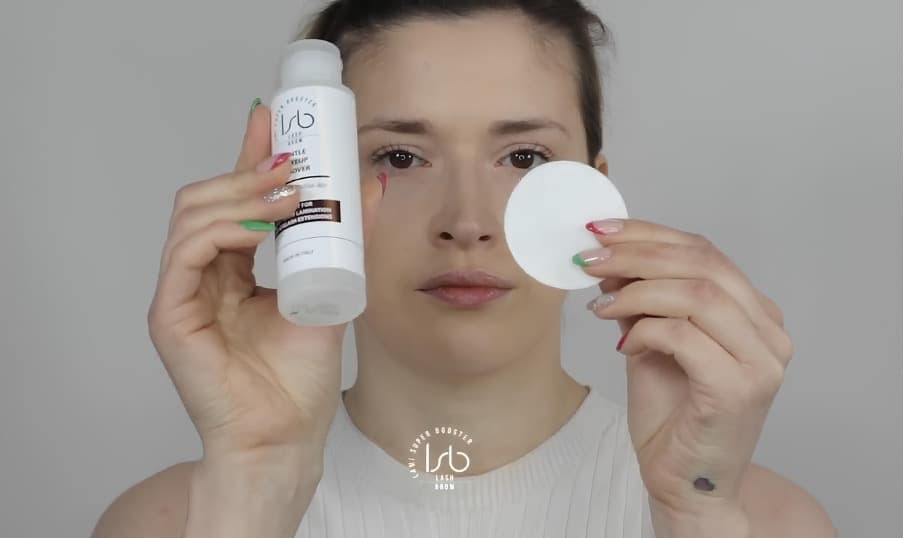
Before you do anything, it’s crucial to perform a patch test with the products you’ll be using to avoid any adverse reactions. Once you’ve confirmed you’re not allergic, you’ll need clean, dry brows. To start, use a mild, oil-free cleanser to remove any residue. This ensures that the lamination products adhere adequately to your brow hairs.
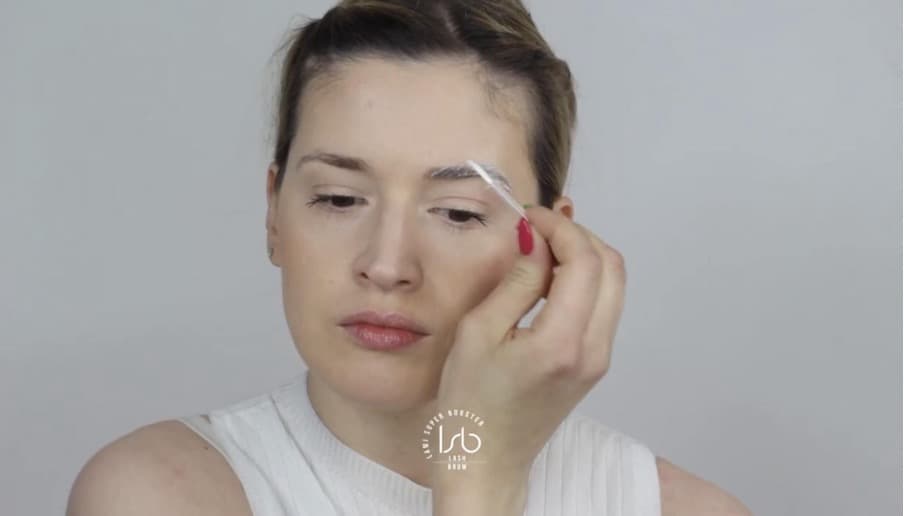
Step 2: Apply a Brow Lifting Cream Choose a reputable brow lamination cream and apply it according to the instructions on the kit. The Lami Super Booster Brow Lamination Kit for Home Use is a perfect option. These creams typically break down the bonds in your brow hairs, making them more pliable.
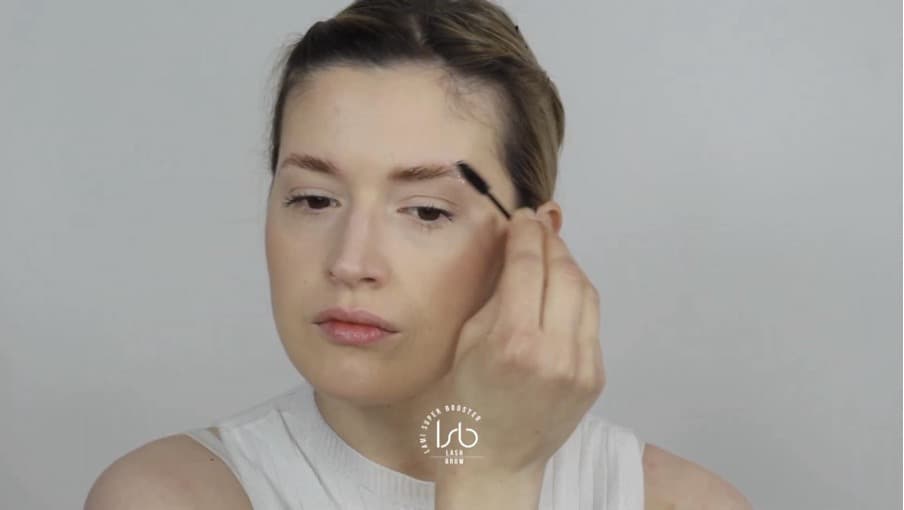
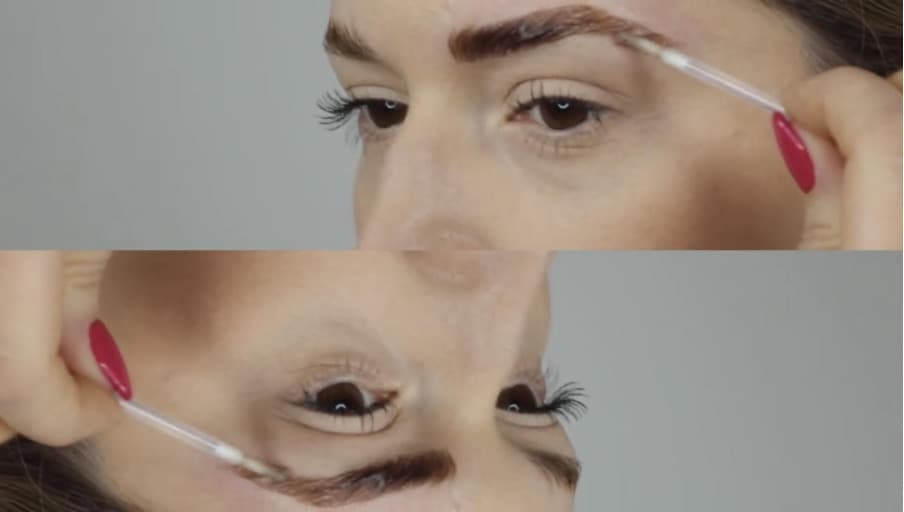
Step 3: Brush Hairs Into Place Using a spoolie brush, align your brow hairs in your desired direction, typically upwards and outwards to achieve that full, fluffy look. For precision, you might want to use Lami Super Booster’s Brow Lamination Tools and glue provided in the brow lamination kit.
Step 4: Apply a Neutralizing Solution After the lifting cream sets, it’s time to neutralize. This step halts the chemical process started by the lifting cream and helps to set the hairs in place. Application guidelines and setting times may vary from kit to kit, so follow the specific directions provided.
Step 5: Moisturize Your Brows Once neutralized and tinted, it’s essential to apply a brow moisturizer or nourishing oil to keep them hydrated. Obsessed with Brow Lamination Kit already includes a lamination cream that is specifically tailored for nourishing eyebrows after brow lamination.
Step 6: Maintain Your Brows To keep your brows looking laminated, avoid wetting them for 24 hours. Use a serum such as Nutrilash and/or brow gel to keep them in pristine condition between lamination sessions.
How Long Does It Last? At-home brow lamination typically lasts between 4-6 weeks. However, longevity can vary based on your aftercare routine and natural hair growth cycle.
Is It Safe? With proper application and adherence to the product instructions, at-home brow lamination is generally safe. Always perform a patch test and use kits from reputable brands.
Recommended Products In addition to the Lami Super Booster range, there are several companies offering brow lamination kits for home use. However, we recommend conducting thorough research and favoring brands that manufacture in Europe, where safety regulations are the most stringent in the world.
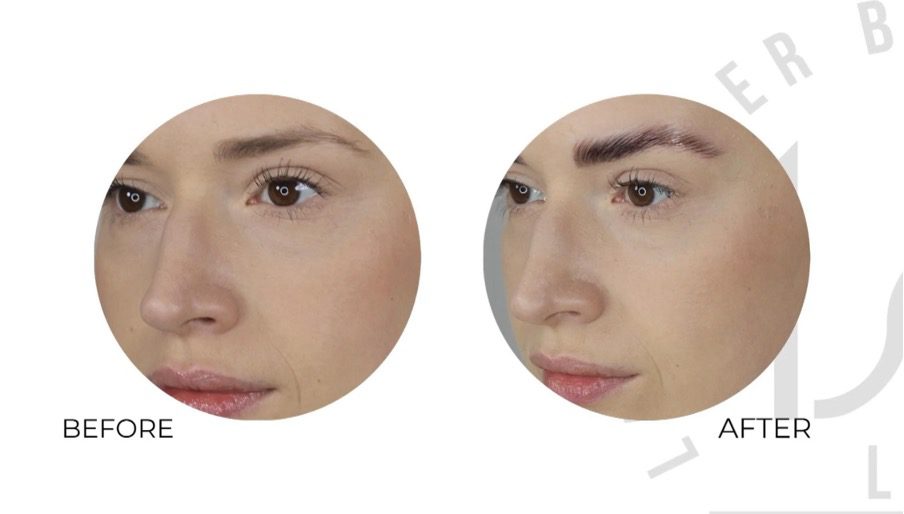
Conclusion Brow lamination at home is a fantastic alternative for maintaining impeccable brows without the salon price tag. Follow this guide and use recommended products to ensure you get the best results. With a little practice, you can enjoy stunning, lifted brows from the comfort of your home.
FAQs What is brow lamination? Brow lamination is a beauty treatment that realigns your brow hairs to keep them in your desired shape.
How long does brow lamination last? It can last 4-6 weeks but varies per individual.
Are eyebrow lamination kits safe? With proper use and a patch test beforehand, they are generally safe.
Can you laminate your eyebrows at home? Absolutely, and this guide has shown you how!
For more information, check out this video: https://www.youtube.com/watch?v=IydARCs-U9Q
When you’re ready to buy your kit and start your DIY brow lamination journey, remember to bookmark this article for easy reference.