

Are you considering getting a lash lift and tint but wondering how long the process takes? This guide will walk you through the typical duration and steps involved in this popular eyelash enhancement treatment.
What is a Lash Lift and Tint?
A lash lift is a semi-permanent treatment that curls your natural lashes from base to tip, creating the appearance of longer, fuller lashes. When combined with a tint, it darkens the lashes for an even more dramatic effect. This innovative procedure has gained popularity in recent years as a low-maintenance alternative to eyelash extensions. The lift works by reshaping your natural lashes, giving them a curved appearance that opens up your eyes and makes them appear larger. The tinting process, on the other hand, involves applying a safe, semi-permanent dye to your lashes, intensifying their color and making them appear thicker and more defined. This combination of lifting and tinting can transform your natural lashes, eliminating the need for daily curling and mascara application. The result is a fresh, wide-awake look that enhances your natural beauty without the need for artificial lashes or heavy makeup.
How Long Does a Lash Lift and Tint Take?
The entire lash lift and tint process typically takes between 45-60 minutes. Here’s a breakdown of the steps:
- Consultation and preparation (5-10 minutes)
- Applying silicone shields (5 minutes)
- Lifting solution application (10-12 minutes)
- Setting solution application (10-12 minutes)
- Tinting process (10-15 minutes)
- Conditioning solution application (5-10 minutes)
- Removal of products and final touch-ups (5-10 minutes)
While this timeframe is typical, it’s important to note that the duration can vary slightly depending on factors such as the length and thickness of your natural lashes, the experience of your technician, and whether you’re having both a lift and tint or just one of these treatments. Some salons may also include additional steps like a lash conditioning treatment, which could extend the process by a few minutes. It’s always a good idea to allow for some extra time in your schedule, especially if it’s your first treatment. Many clients find the process relaxing and enjoy the opportunity to lie back and rest while their lashes are being transformed. Despite the multiple steps involved, the treatment is generally quick compared to other beauty procedures, making it a convenient option for those with busy lifestyles.
The Lash Lift and Tint Process
1. Consultation and Preparation
Your technician will discuss your desired results and assess your natural lashes. They’ll then cleanse your lashes and surrounding eye area. This initial step is crucial as it sets the foundation for the entire treatment. During the consultation, your technician will examine your natural lash length, thickness, and curl pattern. They’ll ask about your lifestyle, any sensitivities or allergies you may have, and what kind of look you’re hoping to achieve. This information helps them customize the treatment to your specific needs and expectations. The cleansing process is thorough, removing any traces of makeup, oil, or debris that could interfere with the lifting and tinting solutions. Your technician may use a gentle, oil-free cleanser and soft brush or swab to ensure your lashes are completely clean. This step not only prepares your lashes for the treatment but also helps to prevent any potential irritation or adverse reactions.
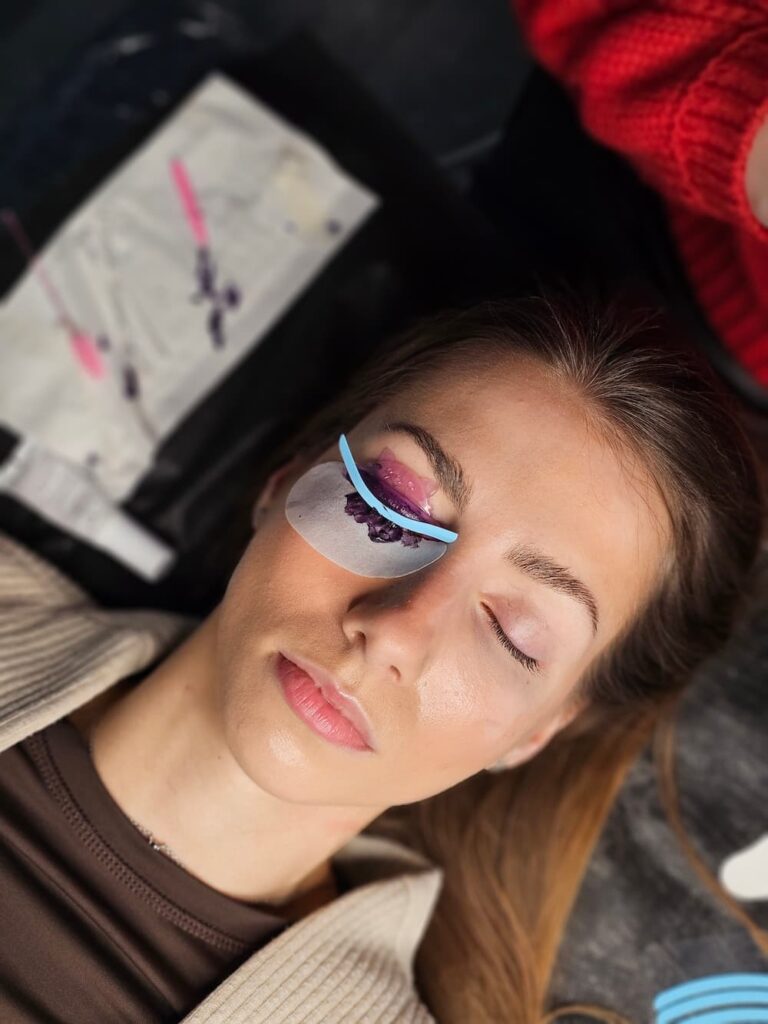
2. Applying Silicone Shields
Silicone shields are carefully placed on your eyelids. Your lashes are then combed upwards and secured to the shields. This step is critical in achieving the desired curl and lift. The silicone shields come in various sizes to accommodate different eye shapes and desired curl intensities. Your technician will select the appropriate size based on your natural lash length and the degree of lift you want. The shields are adhered to your eyelid using a gentle, skin-safe adhesive. Once in place, your lashes are meticulously combed upwards and over the curve of the shield. This process requires precision and patience, as each lash needs to be positioned correctly to ensure an even, natural-looking lift. Your technician may use a fine-toothed lash comb or a specialized tool to separate and align each lash. This careful arrangement is what gives the lift its signature eye-opening effect, creating a beautiful, sweeping curve from lash base to tip.
3. Lifting Solution Application
A perming lotion is applied to break down the bonds in your lash hair, allowing them to be reshaped. This solution is the key to transforming your lashes from straight to curled. The perming lotion contains chemicals that soften the hair structure of your lashes, making them pliable and ready to take on a new shape. Your technician will carefully apply this solution to your lashes. The amount of time the solution is left on depends on your natural lash texture and the desired intensity of the lift. During this time, your eyes will remain closed to prevent any irritation. It’s normal to detect a slight chemical smell, but the process should not be painful or uncomfortable. Your technician will monitor the progress closely, as leaving the solution on for too long can potentially damage your lashes. This step requires expertise to achieve the perfect balance between effective reshaping and maintaining lash health.
4. Setting Solution Application
A fixing (setting) lotion is applied to reform the bonds and set the new curl. This step is crucial in locking in the new shape of your lashes. After the perming solution has done its job of breaking down the lash bonds, the setting solution works to rebuild these bonds in their new, lifted position. This lotion neutralizes the effects of the perming solution and hardens the lash structure in its new curled form. Your technician will apply this solution carefully, ensuring it coats each lash evenly. The setting process usually takes about the same amount of time as the lifting solution application. During this time, your lashes are still molded around the silicone shields, maintaining their lifted position. The setting solution not only fixes the new curl but also helps to condition and nourish your lashes, counteracting any drying effects from the perming solution. This step is what ensures your lash lift will last for weeks, maintaining its shape through showers, swimming, and your daily skincare routine.
5. Tinting Process
If you’ve opted for a tint, a special dye is applied to darken your lashes. The tinting process adds an extra dimension to your lash lift, intensifying the overall effect. The dye used is specifically formulated for use around the delicate eye area and is available in various shades, typically ranging from soft brown to deep black. Your technician will help you choose the most flattering color based on your natural lash color, skin tone, and personal preference. The tint is carefully applied to your lashes, coating them from root to tip. This process not only darkens your lashes but can also make them appear thicker and more defined. The dye penetrates the hair shaft, ensuring the color lasts for several weeks. During the tinting process, your eyes will remain closed, and protective pads may be placed under your lower lashes to prevent any staining of the skin. The tint is left on for a short period, usually around 10-15 minutes, before being gently removed. This step can be particularly beneficial for those with naturally light or blonde lashes, as it eliminates the need for daily mascara application.
6. Conditioning Solution Application
Applying a conditioning solution is a crucial step in the lash lift process, ensuring that the eyelashes remain healthy, hydrated, and nourished after the treatment. After the lifting and setting solutions have done their work, lashes can sometimes be left feeling dry or brittle. The conditioning solution counteracts this by infusing the lashes with essential moisture and nutrients.Typically, this solution contains a blend of vitamins, proteins, and natural oils designed to strengthen and protect the lashes. Ingredients such as keratin, biotin, and panthenol are common, each playing a role in reinforcing the lash structure and promoting growth. Keratin helps to rebuild the lash’s natural protein structure, biotin supports overall lash health and resilience, and panthenol provides deep hydration.
To apply the conditioning solution, a technician will use a small brush or applicator, carefully coating each lash from root to tip. This ensures even distribution and maximizes the conditioning benefits. The solution is usually left on the lashes for a few minutes to allow full absorption before any excess is gently removed.
Not only does this step enhance the immediate appearance and feel of the lashes, making them softer and shinier, but it also extends the longevity of the lash lift. By maintaining lash health, the conditioning solution helps the lifted lashes to retain their curl and strength, ensuring that clients can enjoy the results of their lash lift for a longer period.
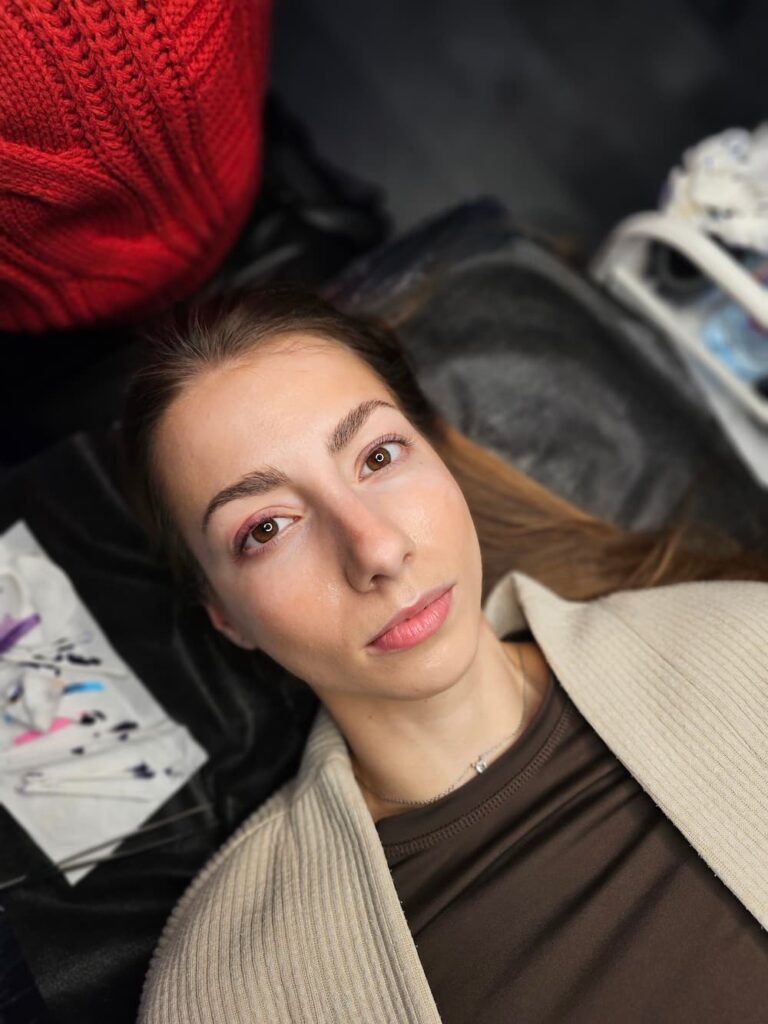
7. Removal and Final Touch-ups
All products are removed, and your lashes are nourished with a conditioning serum. This final step is where you’ll start to see the full effect of your lash lift and tint. Your technician will carefully remove the silicone shields and any remaining product from your lashes. They’ll use a gentle cleanser to ensure all traces of the lifting and tinting solutions are gone, leaving your lashes clean and fresh. Next, a nourishing serum is applied to your lashes. This serum typically contains ingredients like keratin, biotin, or natural oils that help to condition and strengthen your lashes after the chemical processes they’ve undergone. It helps to lock in moisture and promote lash health, ensuring your lashes remain strong and beautiful throughout the duration of your lift. Your technician will then comb through your lashes, separating them and ensuring they’re all perfectly positioned. They may trim any excessively long or out-of-place lashes for a polished look. Finally, they’ll show you the results using a mirror, allowing you to see your transformed lashes from different angles. This is also an opportunity for you to ask any questions about aftercare or maintenance.
Aftercare and Results
After your treatment, avoid water, steam, and eye makeup for 24-48 hours. Your results can last 6-8 weeks with proper care. Use a lash serum to maintain lash health. Proper aftercare is crucial to maximize the longevity and effectiveness of your lash lift and tint. The initial 24-48 hour period is critical as this is when the new shape of your lashes is setting. During this time, it’s important to keep your lashes dry and avoid any activities that could cause them to become wet or steamy, such as showering, swimming, or using a sauna. You should also refrain from applying any eye makeup or using oil-based products around your eyes, as these can interfere with the lift and tint. After this initial period, you can resume your normal activities, but it’s still important to be gentle with your lashes. Avoid rubbing your eyes or using eyelash curlers, which can damage the lift. When removing eye makeup, use a gentle, oil-free remover and avoid tugging or pulling at your lashes. To maintain the health of your lashes, consider using a lash serum regularly. These serums often contain ingredients that nourish and strengthen your lashes, potentially even encouraging growth. With proper care, you can enjoy your lifted and tinted lashes for up to 8 weeks, after which you may notice your lashes gradually returning to their natural state.
Is a Lash Lift Painful?
Most clients find lash lifts comfortable and even relaxing. You’ll have your eyes closed throughout the treatment. The lash lift process is generally considered to be pain-free, which is one of the reasons for its growing popularity. Unlike some beauty treatments that can cause discomfort or require recovery time, a lash lift is a gentle procedure that many find to be a soothing experience. Throughout the treatment, your eyes remain closed, allowing you to relax and even doze off if you wish. Some clients describe the sensation as similar to having a gentle eye massage. The products used in the treatment are applied only to your lashes, not your skin, which minimizes the risk of irritation. However, it’s normal to feel a slight awareness of the shields on your eyelids or a mild tingling sensation when the solutions are applied. If you experience any burning, stinging, or significant discomfort during the treatment, you should immediately inform your technician. It’s also worth noting that while the treatment itself is not painful, some people might feel a slight tightness in their lashes immediately after the lift, which typically subsides within a day or two as your lashes adjust to their new shape.
Can I Still Wear Mascara After a Lash Lift?
Yes, but wait at least 24 hours after your treatment. Water-based mascaras are recommended to avoid breaking down the lift. While one of the main benefits of a lash lift and tint is reducing or eliminating the need for mascara, you can still use it if you desire an even more dramatic look for special occasions. However, it’s crucial to wait at least 24 hours after your treatment before applying any eye makeup, including mascara. This waiting period allows the lift to fully set and minimizes the risk of irritation or infection. When you do start using mascara again, opt for water-based formulas rather than waterproof or oil-based ones. Water-based mascaras are gentler on your lashes and less likely to interfere with the lift. They’re also easier to remove, reducing the need for rubbing or tugging at your lashes. When applying mascara, be gentle and avoid pulling or pressing too hard on your lashes. Start at the base of your lashes and wiggle the wand upwards, following the new curve of your lift. Remember to remove your mascara carefully each night using a gentle, oil-free makeup remover. While mascara can enhance your lifted lashes, many clients find that they no longer need it for everyday wear, as the lift and tint already provide the appearance of longer, darker lashes.
Conclusion
A lash lift and tint is a relatively quick treatment that can dramatically enhance your natural lashes. With results lasting up to 8 weeks, it’s a low-maintenance alternative to lash extensions for those seeking fuller, darker lashes. This treatment offers a way to wake up every day with beautifully curled and defined lashes without the need for daily curling or mascara application. It’s particularly beneficial for those with straight or downward-pointing lashes, as it can open up the eyes and create a more youthful, alert appearance. The semi-permanent nature of the treatment means you can enjoy weeks of effortlessly enhanced lashes, perfect for busy individuals or those who prefer a more natural look. However, it’s important to remember that while a lash lift and tint can significantly improve the appearance of your lashes, it works with what you naturally have. The results can vary depending on your natural lash length, thickness, and color. Regular treatments every 6-8 weeks can help maintain the effect, and many find that their natural lashes become healthier over time with proper care and the reduced need for daily lash curling and mascara use.
If you’re unhappy with your results, don’t worry – there are safe ways to remove a lash lift if needed. Always consult a professional for the best advice on lash treatments. While lash lifts are generally safe and effective, it’s crucial to have them performed by a trained and experienced technician. If you’re not satisfied with your results, whether the curl is too intense or not noticeable enough, it’s best to seek professional help rather than attempting to correct it at home. A skilled technician can assess the situation and may be able to adjust the lift or, if necessary, safely remove it. They can also advise on how to care for your lashes in the meantime and when it would be safe to undergo another treatment. Remember, everyone’s lashes are different, and it may take a couple of treatments to find the perfect lift for your unique lashes. Open communication with your technician about your expectations and results is key to achieving the lash look you desire.